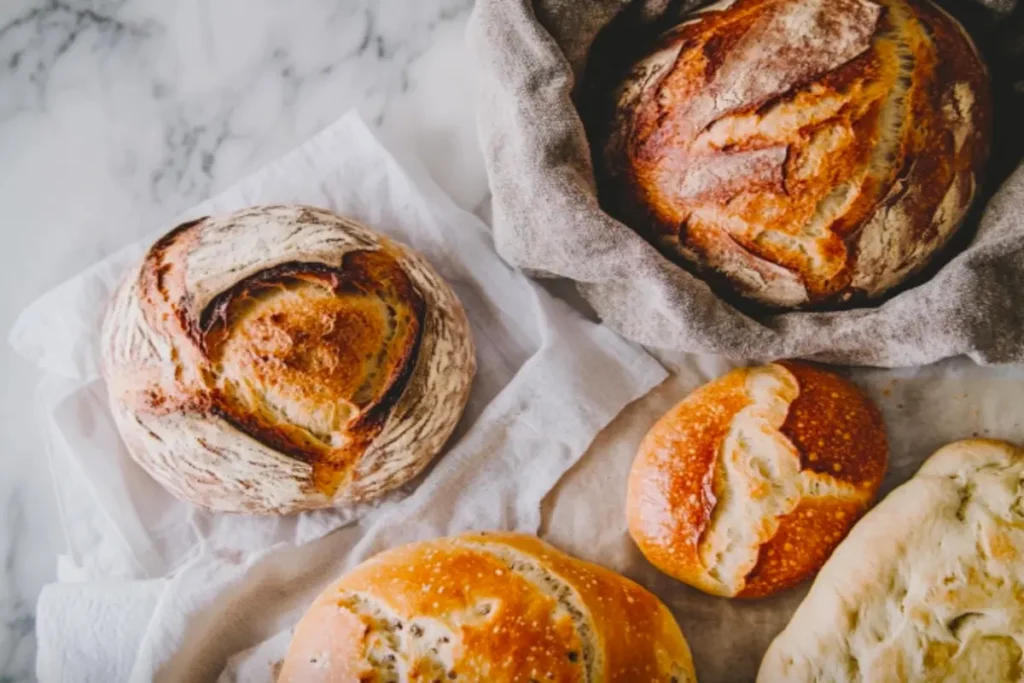
Kneading bread dough is an art form that transforms simple ingredients into a masterpiece. Whether you’re a seasoned baker or a novice, mastering the kneading process is essential for creating bread with the perfect texture, flavor, and structure. In this comprehensive guide, we’ll dive deep into the science, techniques, and tips for kneading bread dough like a pro. By the end, you’ll have all the knowledge you need to elevate your bread-making game.
The Science Behind Kneading Bread Dough
Kneading is more than just a mechanical process—it’s a scientific one. At its core, kneading develops gluten, the protein network that gives bread its structure and elasticity. Gluten forms when two proteins in flour, glutenin and gliadin, combine with water. As you knead, these proteins align and bond, creating a stretchy, elastic dough capable of trapping the gases produced by yeast during fermentation. This trapped gas is what gives bread its airy crumb and light texture.
Without proper kneading, gluten development is insufficient, leading to dense, flat loaves. Over-kneading, on the other hand, can make the dough too tight, inhibiting its ability to rise. Understanding this balance is key to achieving bakery-quality bread at home.
Different Kneading Techniques Explained
There’s no one-size-fits-all approach to kneading. Different doughs and recipes call for different techniques. Here’s a breakdown of the most popular methods:
Traditional Hand Kneading
This classic method involves using the heel of your hand to push, fold, and rotate the dough repeatedly. It’s a great way to develop a feel for the dough’s texture and elasticity.
Stretch & Fold Method
Ideal for high-hydration doughs like sourdough, this technique involves gently stretching the dough and folding it over itself at regular intervals. It’s less aggressive than traditional kneading and helps build strength without overworking the dough.
Slap & Fold
Perfect for sticky, wet doughs, this method involves slapping the dough onto the work surface and folding it repeatedly. It’s a quick way to develop gluten and improve dough structure.
Stand Mixer Kneading
For those who prefer a hands-off approach, a stand mixer with a dough hook can knead dough efficiently and consistently. It’s especially useful for large batches or doughs with high butter content, like brioche.Choosing the Right Flour for Kneading Success
Choosing the Right Flour for Kneading Success
The type of flour you choose is one of the most critical factors in determining the success of your bread dough. Flour isn’t just a base ingredient—it’s the foundation of your dough’s structure, texture, and flavor. Different flours have varying protein contents, which directly affect gluten development and kneading efficiency. Let’s explore the most common types of flour and how they impact your bread-making process.
Bread Flour: The Gold Standard for Kneading
Bread flour is the go-to choice for most bakers, and for good reason. With a protein content ranging from 12% to 14%, it’s specifically designed to create strong, elastic dough. The high gluten potential ensures that your dough can trap the gases released by yeast, resulting in a light, airy crumb and a well-risen loaf. Bread flour is ideal for recipes that require extensive kneading, such as artisan bread, baguettes, and pizza dough. If you’re aiming for a chewy, structured bread, bread flour is your best bet.
All-Purpose Flour: Versatile and Reliable
All-purpose flour is a kitchen staple for a reason. With a protein content of around 10% to 12%, it’s versatile enough to handle a wide range of recipes, from soft sandwich bread to tender dinner rolls. While it doesn’t have the same gluten-forming potential as bread flour, it’s still a great option for beginners or those who want a softer crumb. If you’re experimenting with different types of bread or don’t have bread flour on hand, all-purpose flour will get the job done.
Whole Wheat Flour: Nutritious but Challenging
Whole wheat flour is a healthier alternative, packed with bran and fiber. However, these same components can interfere with gluten development, making it more challenging to knead. Whole wheat dough tends to be denser and less elastic, so it requires extra hydration and kneading time to achieve a good structure. Many bakers mix whole wheat flour with bread flour to balance nutrition and texture. If you’re using 100% whole wheat flour, consider adding a bit more water and kneading for a longer period to ensure proper gluten formation.
Specialty Flours: Exploring Unique Flavors and Textures
Beyond the basics, there are countless specialty flours to experiment with, such as rye, spelt, and einkorn. Each brings its own unique flavor and texture to the table, but they often require adjustments in kneading and hydration. For example, rye flour has a low gluten content, so it’s often combined with bread flour to create a workable dough. If you’re feeling adventurous, try incorporating small amounts of these flours into your recipes for a new twist on traditional bread.
Gluten-Free Flours: A Different Approach
For those avoiding gluten, traditional kneading techniques won’t apply. Gluten-free flours, such as almond, rice, or tapioca flour, rely on other binding agents like xanthan gum or psyllium husk to create structure. Kneading gluten-free dough is less about developing gluten and more about ensuring even hydration and mixing. If you’re venturing into gluten-free baking, be prepared to adjust your techniques and expectations.
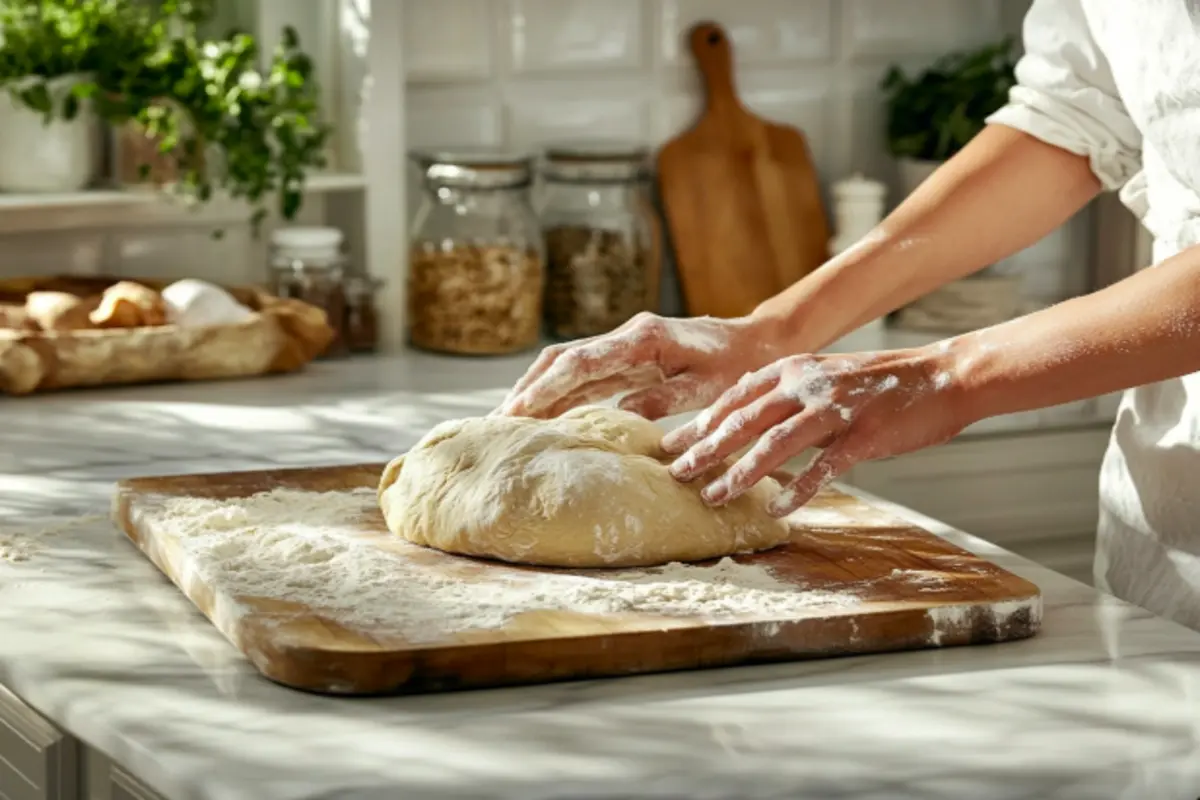
Step-by-Step Guide to Hand Kneading Dough
Hand kneading is a timeless technique that connects you with the dough on a deeper level. It’s a tactile process that allows you to feel the dough’s transformation from a shaggy mass to a smooth, elastic ball. Here’s a detailed guide to mastering hand kneading:
Prepare Your Work Surface
Lightly flour your countertop or a large cutting board to prevent the dough from sticking. Avoid using too much flour, as it can dry out the dough and alter its texture.
Shape the Dough into a Ball
After mixing your ingredients, gather the dough into a rough ball. This makes it easier to handle and knead.
Press and Push
Use the heel of your hand to press down on the dough and push it away from you. This motion stretches the gluten strands and begins to develop the dough’s structure.
Fold and Rotate
Fold the dough back over itself and give it a quarter turn. This ensures even kneading and prevents the dough from sticking to the surface.
Repeat the Process
Continue pressing, pushing, folding, and rotating for 8 to 10 minutes. As you knead, you’ll notice the dough becoming smoother, more elastic, and less sticky.
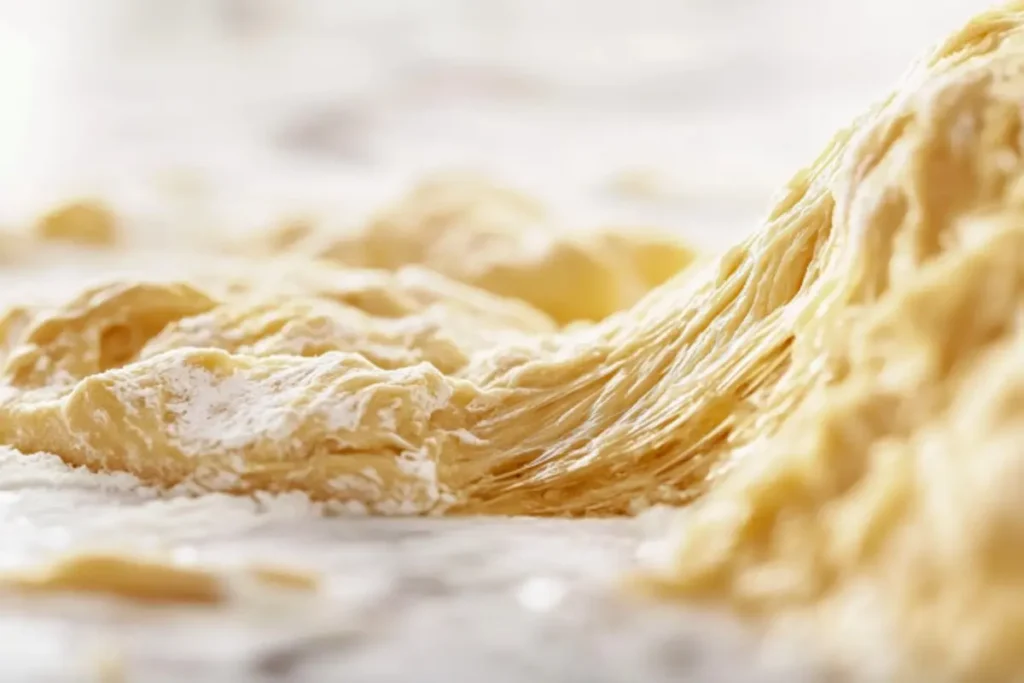
Test for Readiness
Perform the windowpane test: Take a small piece of dough and gently stretch it between your fingers. If it stretches thin enough to let light through without tearing, it’s ready. If it tears easily, continue kneading for a few more minutes.
Rest the Dough
Once kneaded, shape the dough into a ball and let it rest. This allows the gluten to relax and the dough to rise properly during fermentation.
Common Kneading Mistakes and How to Fix Them
Even experienced bakers can run into issues when kneading dough. Here are some common mistakes and how to troubleshoot them:
Over-Kneading: When Too Much is Too Much
Over-kneading can make the dough tight and difficult to shape. It may also result in a dense, tough loaf with little oven spring. To avoid this, pay close attention to the dough’s texture and stop kneading as soon as it passes the windowpane test. If you’re using a stand mixer, keep an eye on the dough and check its progress frequently.
Under-Kneading: The Dense Loaf Dilemma
Under-kneaded dough lacks the gluten structure needed to trap gases, leading to a dense, flat loaf. If your dough feels slack and doesn’t spring back when poked, it needs more kneading. Continue working the dough until it becomes smooth and elastic.
Sticky Dough: A Sticky Situation
Sticky dough can be frustrating, but resist the urge to add too much flour. Excessive flour can dry out the dough and alter its texture. Instead, use a light coating of oil on your hands or work surface to manage stickiness. Alternatively, let the dough rest for a few minutes to allow the gluten to develop naturally.
Inconsistent Kneading: Uneven Texture
If you don’t knead the dough evenly, it may develop weak spots that affect its rise and texture. Make sure to rotate the dough regularly and apply consistent pressure during kneading.
How Long Should You Knead Bread Dough?
The kneading time depends on the method you’re using and the type of dough you’re working with. Here’s a general guide:
Hand Kneading: 8 to 15 minutes
Hand kneading takes longer because it relies on manual effort. However, it allows you to develop a feel for the dough’s texture and elasticity.
Stand Mixer: 5 to 8 minutes on medium speed
A stand mixer with a dough hook can knead dough more efficiently. Keep an eye on the dough to avoid over-kneading.
Stretch & Fold: Every 30 minutes over 2 to 3 hours
This technique is common for high-hydration doughs like sourdough. Instead of continuous kneading, you gently stretch and fold the dough at intervals.
Tools That Make Kneading Easier
While kneading can be done entirely by hand, a few tools can make the process more efficient and enjoyable:
Dough Scraper: This handy tool helps you handle sticky dough, clean your work surface, and divide dough into portions.
Stand Mixer with Dough Hook: A stand mixer takes the effort out of kneading and ensures consistent results, especially for large batches.
Flour Duster: A flour duster allows you to apply a light, even coating of flour to your work surface without overdoing it.
Bench Knife: Similar to a dough scraper, a bench knife is great for cutting and shaping dough.
Can You Knead Dough Without a Mixer?
Absolutely! Hand kneading is a traditional and effective method that many bakers swear by. It allows you to develop a feel for the dough’s texture and ensures you don’t overwork it. While a mixer offers convenience, hand kneading can be just as effective, especially for smaller batches or high-hydration doughs.
The Role of Resting and Autolyse in Kneading
Resting and autolyse are two techniques that can make kneading easier and improve your dough’s texture:
Autolyse: This involves mixing flour and water and letting the dough rest for 20 to 60 minutes before kneading. During this time, the flour fully hydrates, and gluten begins to develop naturally. This makes the dough easier to knead and improves its extensibility.
Resting: After kneading, let the dough rest to allow the gluten to relax. This makes shaping easier and ensures a better rise during fermentation.
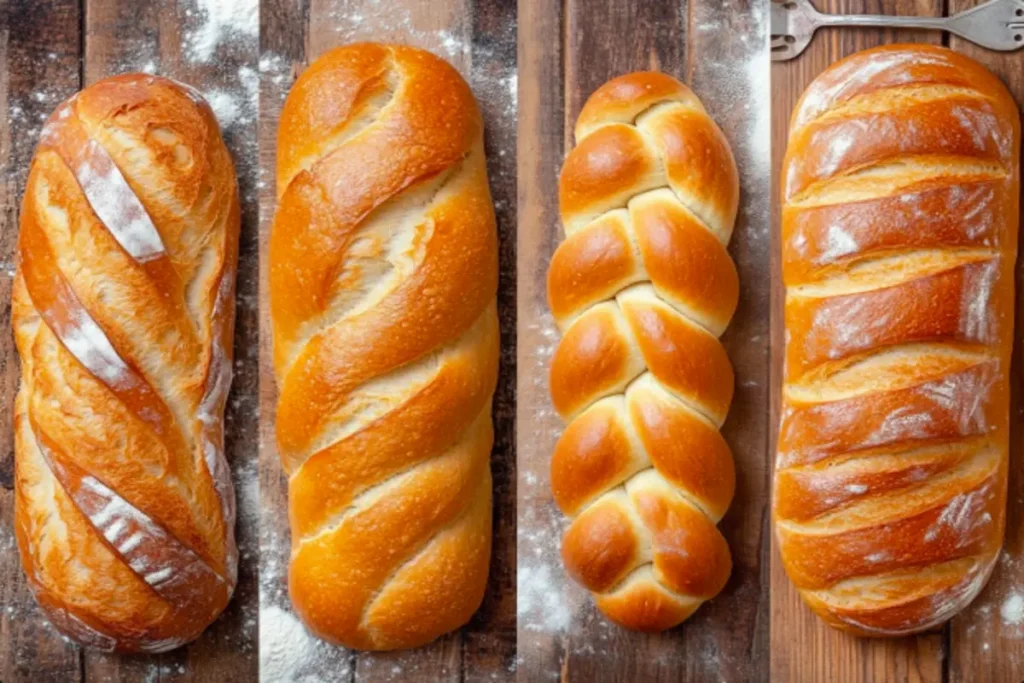
Kneading for Different Bread Types
Different types of bread require different kneading approaches. Here’s a quick guide:
Artisan Loaves: These breads, like baguettes and ciabatta, require longer kneading to develop a strong gluten network and an open crumb.
Sandwich Bread: Moderate kneading ensures a soft, even texture perfect for sandwiches.
Pizza Dough: Stretch & fold techniques work best for pizza dough, giving it the flexibility needed for stretching and shaping.
Brioche: This rich dough contains a high amount of butter, which requires extensive kneading to incorporate evenly.
Sourdough: Gentle folding is preferred over aggressive kneading to preserve the delicate structure of sourdough.
For a step-by-step recipe, check out our Sourdough Bagel Recipe.
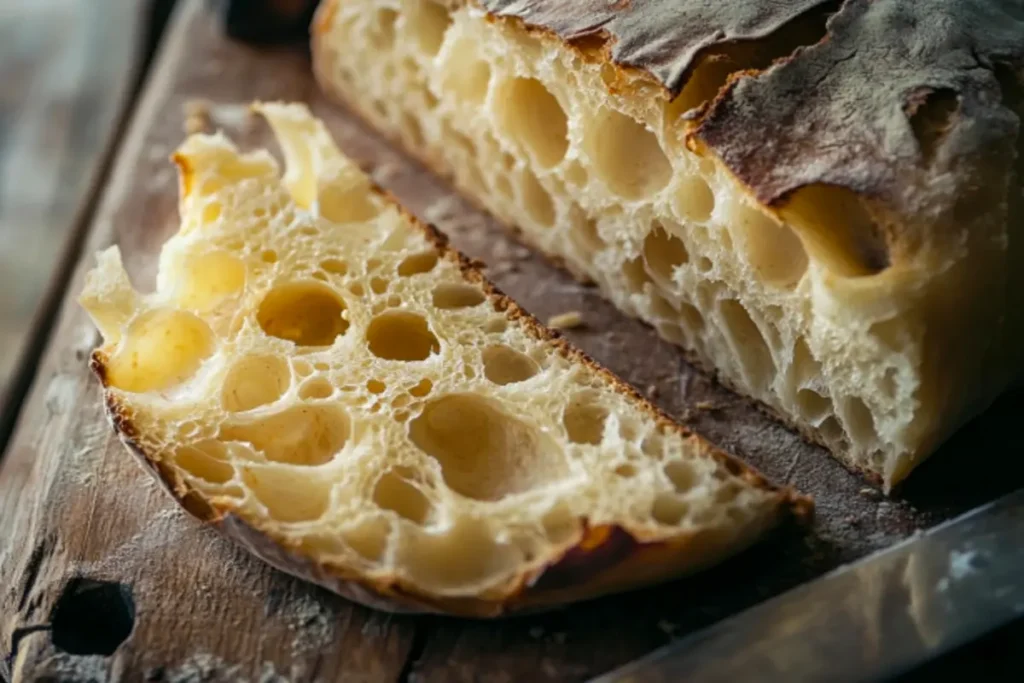
How Kneading Affects Bread Texture and Flavor
Kneading plays a crucial role in determining the texture and flavor of your bread. Proper kneading creates an even crumb structure and enhances flavor development by ensuring even fermentation. Over-kneading can lead to a tight crumb and a bland flavor, while under-kneading results in a gummy texture and uneven rise. The structure and quality of bread dough are directly influenced by proper kneading, which determines the final texture and flavor of the baked bread.
Kneading in High vs. Low Hydration Doughs
High-Hydration Doughs: These doughs, like sourdough, benefit from stretch & fold techniques instead of traditional kneading. The high water content makes them sticky and difficult to handle, but the stretch & fold method builds strength without overworking the dough.
Low-Hydration Doughs: These doughs require more intensive kneading to achieve elasticity and structure. Examples include bagels and pretzels.
How to Tell If Your Dough is Kneaded Enough
Windowpane Test: Stretch a small piece of dough thinly. If it’s translucent and doesn’t tear, it’s ready.
Poke Test: Press a finger into the dough. If it springs back slowly, the gluten is well-developed.
Conclusion: Mastering the Art of Kneading for Perfect Bread
Kneading is the heart of bread-making, transforming simple ingredients into a delicious, structured loaf. By understanding the science, experimenting with techniques, and avoiding common mistakes, you can elevate your bread-making skills and achieve bakery-quality results at home. Remember, practice makes perfect—so keep kneading, and enjoy the delicious rewards of your efforts!
By following this guide, you’ll be well on your way to kneading bread dough like a pro. Happy baking!
FAQs on Kneading Bread Dough
1- How do I know if I over-kneaded my dough?
Over-kneaded dough becomes tight and difficult to shape. It may not rise properly and will result in a tough texture.
2- Can I knead dough too little?
Yes, under-kneaded dough lacks structure, leading to a dense loaf that does not rise properly.
3- Why does my dough feel too sticky to knead?
Some stickiness is normal. Resist adding too much flour; instead, use lightly floured hands or a bench scraper.
4- Should I knead dough before or after the first rise?
Dough is typically kneaded before the first rise. Some recipes require light degassing after proofing.