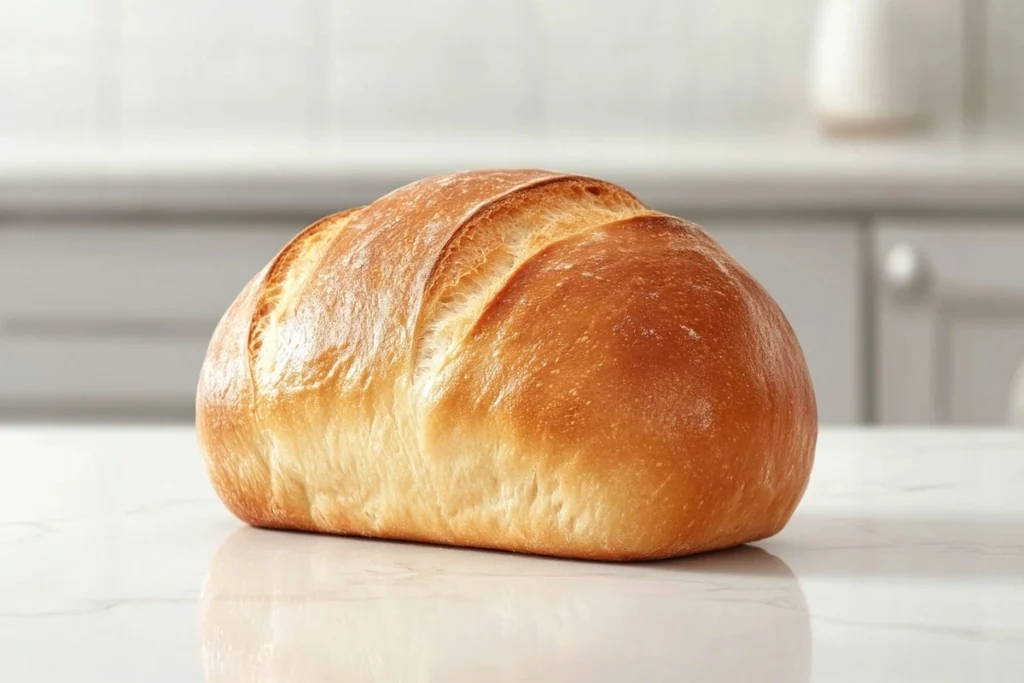
Have you ever wondered what is the secret to making good sourdough bread? The truth lies in a combination of techniques, ingredients, and patience. From crafting the perfect sourdough starter to mastering fermentation, hydration, and baking methods, every detail plays a crucial role in achieving the ideal loaf. In this guide, we’ll walk you through 7 expert tips that will help you make the most delicious sourdough bread with a chewy texture and a tangy flavor.
Understanding Sourdough Bread and Its Unique Characteristics
Sourdough bread stands apart from other types of bread due to its unique fermentation process. Unlike breads made with commercial yeast, sourdough relies on wild yeast and natural bacteria that occur naturally in the environment. This method of fermentation results in a bread that has a distinctive flavor, texture, and aroma. The long, slow fermentation process not only enhances the flavor but also makes sourdough bread easier to digest.
The Science Behind Fermentation
Fermentation is the heart of sourdough baking. Wild yeast consumes the sugars in the dough, producing carbon dioxide, which helps the dough rise. Alongside yeast, lactic acid bacteria (LAB) also play a key role in the fermentation process. These bacteria consume sugars as well, releasing acids that contribute to sourdough’s signature tang. Unlike commercial yeast, which works quickly, wild yeast and LAB operate slowly, creating more complex flavors and better textures as they work.
Why Sourdough Tastes Better
One of the reasons sourdough tastes better than many other breads is due to the extended fermentation process. The slow breakdown of sugars, along with the production of acids, creates a bread with a rich, tangy flavor that you simply can’t get from faster methods. Additionally, the slow fermentation process helps break down gluten and phytic acid, making sourdough easier to digest while giving it a chewy texture and a crisp, golden crust.
For more detailed information about the history and process of sourdough baking, check out this comprehensive article on the subject.
1. Choose the Right Flour for the Best Sourdough Loaf
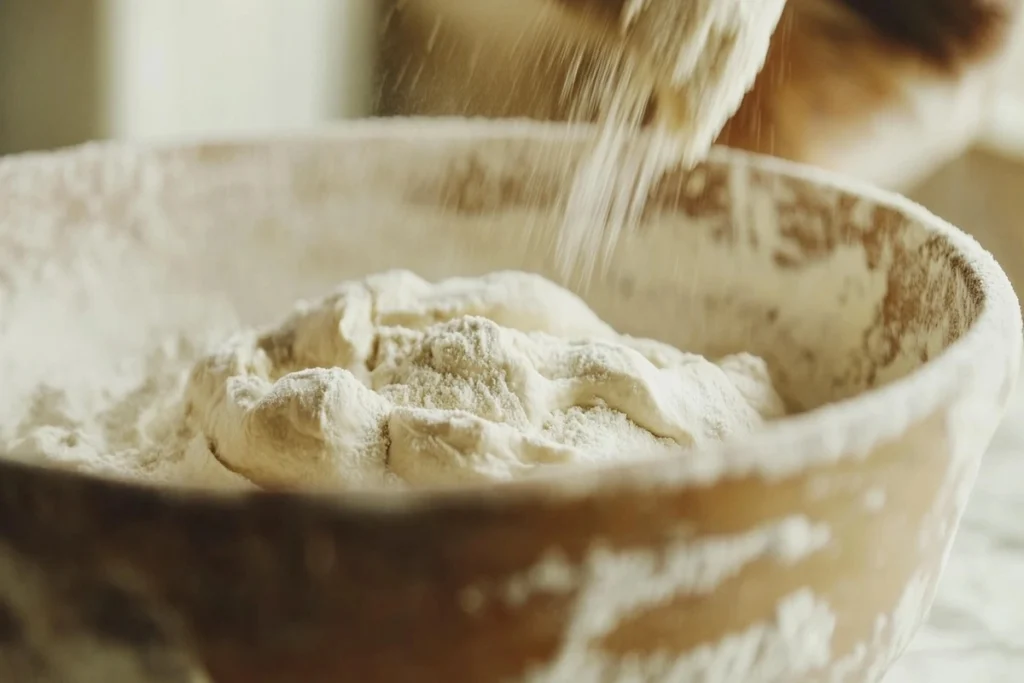
Selecting the right flour is a crucial step in making a successful sourdough loaf. The flour you choose directly impacts the texture, flavor, and rise of the bread. Different types of flour provide varying levels of protein and other characteristics that affect how the dough behaves during fermentation. Understanding which flour works best for sourdough is key to achieving a loaf with the ideal crumb structure and taste.
Best Flour Types for Sourdough
When it comes to sourdough, there are a few flour types that are commonly used to achieve the best results. Here’s how some of the most popular flours compare:
- Bread Flour: This is the most commonly used flour for sourdough. It has a higher protein content (12-14%), which is essential for developing strong gluten. The high protein content helps the dough rise and form a chewy, airy crumb. Bread flour also contributes to the overall structure of the loaf, making it perfect for sourdough.
- Whole Wheat Flour: Whole wheat flour is made from the entire wheat kernel, including the bran, germ, and endosperm. This gives it a higher fiber content and a richer, nuttier flavor. While whole wheat flour can make the dough denser, it adds a depth of flavor and nutritional benefits. It’s often combined with bread flour to strike a balance between flavor and texture.
- Rye Flour: Rye flour is traditionally used in sourdough recipes, particularly for rustic and flavorful loaves. It has a lower gluten content than wheat flour, which results in a denser texture. Rye flour also introduces a unique tangy flavor, which complements the naturally sour taste of sourdough. It’s often used in combination with bread flour to help provide structure while still capturing that distinctive rye flavor.
How Protein Content Affects Gluten Development
The protein content in flour plays a vital role in the development of gluten, which is key to the texture of sourdough bread. Gluten is a network of proteins that gives dough its elasticity, allowing it to trap the gases produced by yeast during fermentation. This is what creates the rise and structure of the bread.
- High-Protein Flour (e.g., Bread Flour): Flours with a higher protein content, such as bread flour, help to form a strong gluten network. This results in a dough that is elastic and able to hold its shape well during fermentation. The higher protein helps the bread rise more effectively and gives the crumb a chewy texture.
- Low-Protein Flour (e.g., All-Purpose Flour): Flours with lower protein content, such as all-purpose flour, produce less gluten. This can result in a softer, denser loaf. While some bakers use all-purpose flour for lighter, more delicate breads, it’s not ideal for sourdough if you want a chewy texture with a good rise.
In sourdough baking, choosing a flour with the right protein content helps control the texture and overall outcome of your bread. For the best results, a combination of high-protein bread flour and other types, like whole wheat or rye, can help achieve both a strong rise and a complex, flavorful crumb.
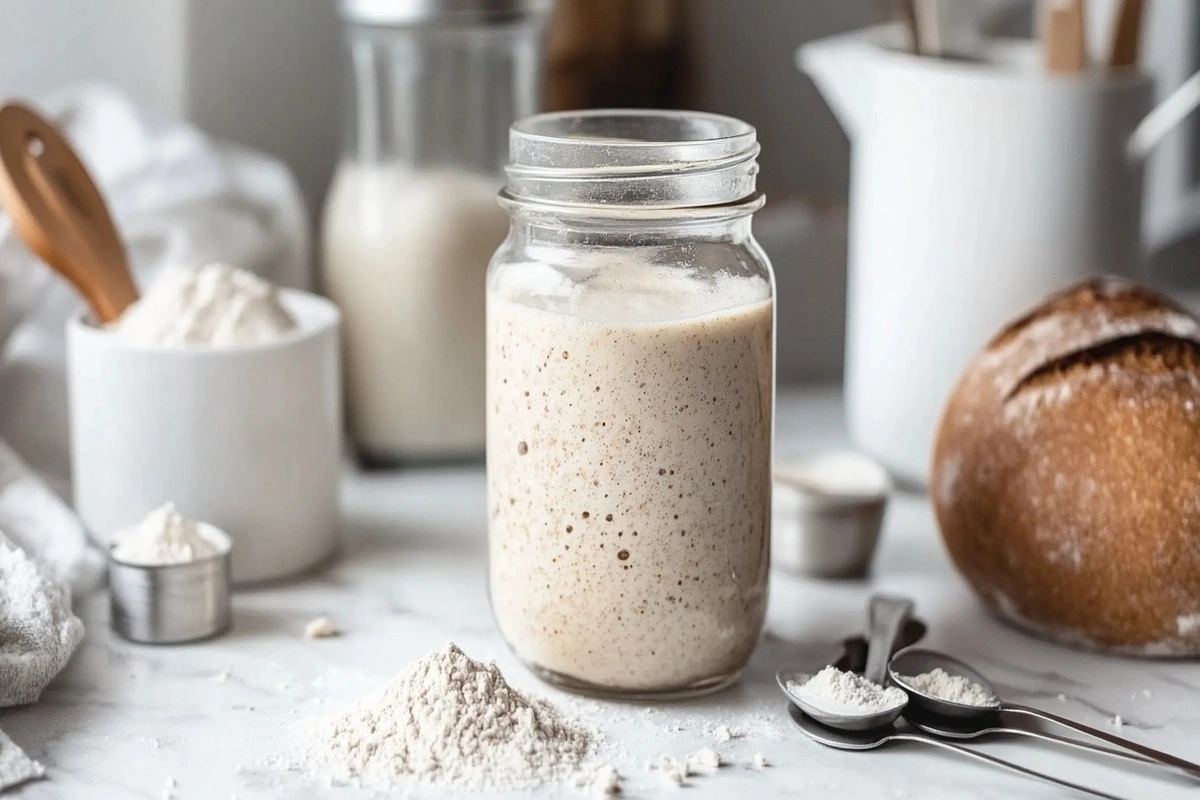
2. Master Your Sourdough Starter for a Strong Foundation

A sourdough starter is the heart and soul of sourdough bread, serving as the natural leavening agent that helps the dough rise. Unlike breads that use commercial yeast, sourdough relies on a mixture of flour and water that ferments over time, cultivating wild yeast and bacteria from the environment. A strong, healthy starter is key to producing bread with good rise, flavor, and texture. Learning how to properly feed, maintain, and troubleshoot your starter will ensure success in your sourdough baking.
How to Feed and Maintain Your Starter
Maintaining your sourdough starter involves feeding it regularly with flour and water to keep the wild yeast and bacteria active. Here’s a step-by-step guide to help you keep your starter healthy and thriving:
- Start with Equal Parts Flour and Water: Combine equal parts flour and water in a clean jar or container. A common ratio is 1:1 by weight (e.g., 100g of flour and 100g of water). Stir the mixture thoroughly until it’s well combined.
- Cover and Let It Rest: Cover the jar loosely to allow air in, which is important for cultivating wild yeast. Leave the jar at room temperature (ideally around 70°F/21°C) for 24 hours. You should begin to see small bubbles or signs of fermentation after the first day.
- Feed Regularly: After 24 hours, discard about half of the starter (to keep the amount manageable) and feed the remaining starter with equal parts flour and water. Repeat this process every 24 hours to keep the starter active. If you’re planning to bake, you’ll want to feed it daily for a more robust and active starter.
- Adjust Consistency: Depending on your environment, you might need to adjust the consistency of the starter. If it’s too thick, add a little more water. If it’s too runny, use a bit more flour. You want a starter that’s thick but still pourable.
- Use or Store the Starter: Once your starter is strong and active, you can use it in your sourdough recipes. If you’re not ready to bake, store the starter in the fridge and feed it once a week. Before using it again, bring it to room temperature and feed it for a couple of days to reactivate it.
- Observe the Starter: Look for signs of healthy fermentation, such as bubbles, a rise in volume, and a tangy smell. If the starter doubles in size within 4 to 6 hours after feeding, it’s ready for baking.
Common Starter Problems and How to Fix Them
Sometimes, sourdough starters don’t behave as expected. Here are some common issues you might encounter and how to fix them:
- Starter Isn’t Bubbling or Rising: If your starter isn’t showing signs of fermentation, it may be in too cool of a spot. Move it to a warmer location, around 75°F/24°C, to encourage activity. It may also need a few more feedings to get going. Be patient and continue feeding it every 24 hours.
- Unpleasant Odor (Like Rotting or Nail Polish): A foul smell may indicate that the starter has been contaminated or is not balanced. To fix this, discard half of the starter and continue feeding it with fresh flour and water more frequently. Make sure the jar is clean and your feeding routine is consistent.
- Starter Is Too Runny or Thin: If the starter is too liquid, it might have too much water. Add more flour to thicken it, or reduce the amount of water you use during the next feeding. A thicker starter ferments more slowly but develops better structure for the dough.
- Too Sour or Acidic: If your starter is too sour, it could be fermenting for too long without enough feedings. Try shortening the time between feedings and keeping it at a slightly cooler temperature. You can also feed the starter with a higher proportion of fresh flour to dilute the acidity.
- Mold Growth: Mold can appear if the starter is kept in an overly warm environment or if there’s too much moisture. If mold appears, discard the starter and start fresh. To prevent mold, make sure the jar is well-covered and avoid over-wetting the starter.
By following these steps and troubleshooting tips, you can master the art of maintaining a healthy sourdough starter. A well-maintained starter will provide the foundation for delicious, flavorful sourdough bread every time.
3. Manage Hydration Levels for the Perfect Dough
Understanding hydration ratios is a key aspect of sourdough bread baking. Hydration refers to the amount of water in the dough relative to the flour. The water content influences the dough’s texture, how easily it can be handled, and the final crumb structure. By managing hydration levels carefully, you can achieve a loaf with the right texture, rise, and flavor.
How Water Content Affects Texture and Crust
Different hydration percentages can significantly alter the texture of your dough and the crust of the bread. Here’s a breakdown of how water content impacts sourdough:
- Low Hydration (50-60%): Dough with lower hydration will result in a denser, firmer texture. It’s easier to handle and shape but may not produce as airy a crumb. The crust will be thicker, and the bread will have fewer open holes in the crumb structure.
- Medium Hydration (65-75%): This is the range most bakers work in for sourdough. The dough is tacky but manageable and will produce a loaf with a chewy crumb and a crisp crust. It strikes a balance between ease of handling and achieving a good rise.
- High Hydration (80% and above): High hydration dough results in a more open crumb, creating large holes in the bread. It can be more challenging to handle due to its stickiness but yields a lighter, airier loaf with a thinner, crisper crust.
Best Hydration Levels for Beginners
For beginners, it’s recommended to start with a hydration level around 70%. This is a good balance between handling ease and getting a good rise. With 70% hydration, the dough is slightly sticky but manageable, allowing you to develop the right texture without it being too hard to shape. Once you’re comfortable with this level, you can experiment with higher hydration for different textures and crusts.
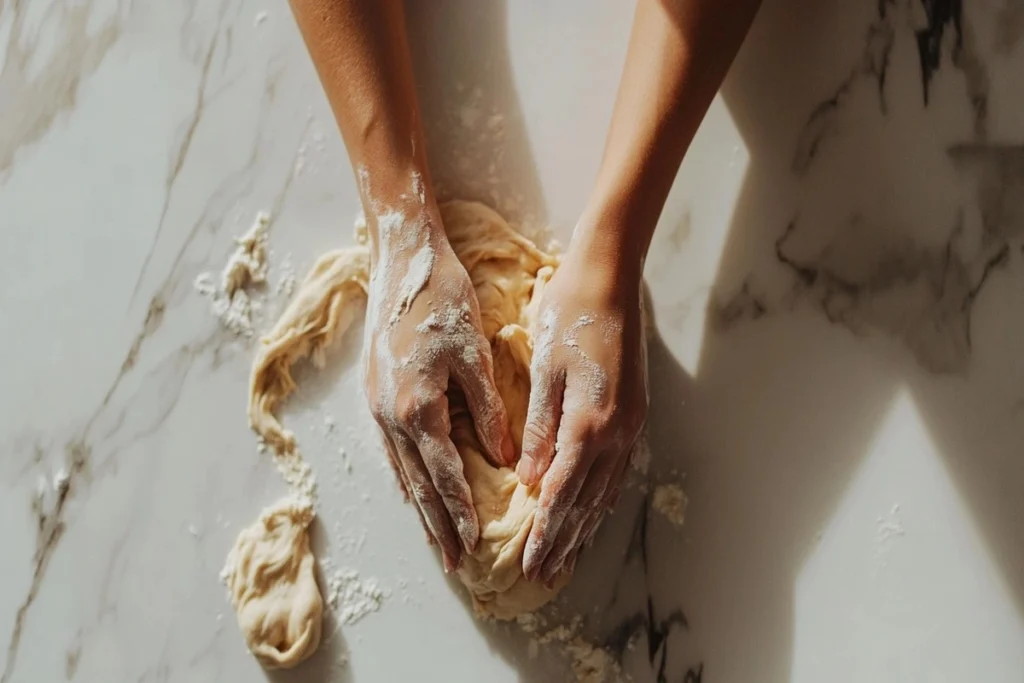
4. Develop Gluten with Kneading, Stretching, and Folding
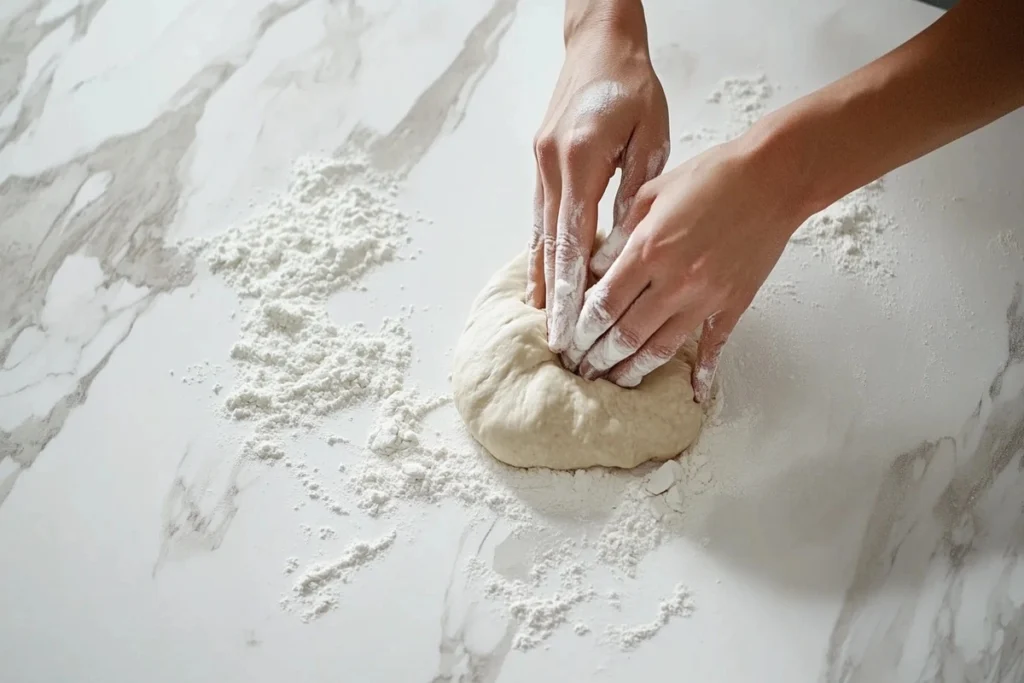
Building gluten structure is essential for creating sourdough bread with the right texture and rise. The goal is to develop a strong gluten network that can trap the gases produced during fermentation, allowing the dough to rise and form the desired crumb.
Autolyse and Bulk Fermentation
Autolyse is a technique where you mix the flour and water before adding the starter and salt, allowing the dough to rest for 20-30 minutes. This process helps to hydrate the flour, making gluten development easier without overworking the dough. After the autolyse, you can continue with bulk fermentation, which is the period during which the dough rises and ferments. Both methods allow the gluten to develop gradually, resulting in a dough that’s easier to shape and more elastic.
Stretch and Fold vs. Traditional Kneading
Stretch and fold is a gentler method than traditional kneading. During stretch and fold, you stretch the dough, then fold it over itself to strengthen the gluten. This technique is particularly useful for higher hydration doughs, where traditional kneading might be too difficult. While traditional kneading works well for firmer dough, stretch and fold allows for better gluten development without overworking the dough.
If you’re looking for more tips on developing gluten and working with your dough, check out the Guide to Kneading Bread Dough for expert techniques.
5. Optimize Fermentation Time and Temperature for Better Flavor
Fermentation time plays a significant role in the development of sourdough flavor. The longer the fermentation, the more complex the flavors become as the yeast and bacteria continue to ferment and break down the flour. Temperature also impacts fermentation speed—warmer temperatures speed up fermentation, while cooler temperatures slow it down, giving the dough more time to develop flavor.
Cold Fermentation for Better Flavor
Cold fermentation, or refrigerating your dough during bulk fermentation or proofing, leads to more pronounced flavors in sourdough bread. The slower fermentation process at cooler temperatures allows the wild yeast and bacteria to develop more complex acids, which enhance the tangy flavor of the bread.
Signs of Properly Fermented Dough
Properly fermented dough should have increased in volume, feel elastic, and show signs of bubbling. When you perform the “poke test” (lightly pressing a finger into the dough), the dough should spring back slowly but not fully. If it bounces back quickly, it may need more time. The dough should also have a pleasant, slightly tangy smell.
6. Perfect Your Shaping and Scoring Techniques
Shaping your dough correctly is essential to ensuring the loaf holds its structure during baking and achieves a beautiful rise.
How to Shape for Maximum Oven Spring
Proper shaping allows the dough to hold gas produced during fermentation and expand in the oven. When shaping, ensure that the dough is tensioned evenly, creating surface tension. This will help the dough expand upward rather than spread out during baking. The stronger the dough’s surface tension, the better the oven spring.
Scoring Patterns and Their Effects on the Final Loaf
Scoring the dough before baking allows it to expand in a controlled manner. Different scoring patterns, such as a single slash or intricate designs, affect the final loaf’s appearance and how it rises. A simple slash helps the bread expand upward, while more complex patterns can create a decorative crust. The pattern you choose also influences the direction of expansion and how the crust forms.
7. Master the Baking Process: Temperature, Steam, and Timing
The right baking conditions are essential for getting the perfect sourdough loaf. Temperature, steam, and timing all play a role in creating the ideal texture and crust.
Using a Dutch Oven for the Best Crust
A Dutch oven is often used in sourdough baking because it traps steam during the first part of baking. The steam helps keep the dough’s surface moist, allowing it to expand fully before the crust sets. After a period of baking with the lid on, the lid is removed, allowing the crust to brown and become crispy.
How to Get an Open Crumb and Crispy Crust
To achieve an open crumb (large holes) and a crispy crust, it’s important to bake the bread at a high temperature (usually 450°F/230°C or higher) and introduce steam during the first part of baking. The steam helps the dough rise more effectively in the oven, leading to a light, airy crumb and a crispy, golden-brown crust.
Storing and Preserving Sourdough Bread for Maximum Freshness
Once your sourdough bread is baked, you’ll want to store it properly to maintain its freshness.
Best Ways to Store Sourdough
Sourdough bread is best stored at room temperature. A bread box or a paper bag works well for keeping the bread fresh. If you need to store it for longer periods, you can freeze it. Slice the loaf before freezing, so you can take out individual slices as needed.
Reviving Stale Sourdough
To revive stale sourdough, you can sprinkle the bread with a little water and place it in a warm oven for a few minutes. This will refresh the crust and restore some of the moisture in the crumb.
Common Mistakes When Making Sourdough and How to Avoid Them
There are a few common mistakes that sourdough bakers make, but with awareness, they can be easily avoided. Over-proofing, under-proofing, and incorrect shaping are common issues that can affect your final loaf. Keeping track of fermentation time, maintaining proper hydration levels, and paying attention to dough handling will help you avoid these mistakes and achieve better results.
Final Thoughts
Mastering sourdough baking is a rewarding journey that involves understanding the intricacies of fermentation, hydration, gluten development, and the baking process. By selecting the right flour, carefully managing hydration levels, and paying attention to fermentation time and temperature, you can create sourdough bread with a perfectly chewy texture and tangy flavor. Techniques like autolyse, stretching and folding, and proper shaping and scoring help build structure and ensure an even rise. Finally, optimizing the baking process with the right temperature and steam will give you a crisp, golden crust and an open crumb.
Sourdough bread-making is as much about practice and patience as it is about technique. The more you experiment and refine your process, the more you’ll develop your skills and find what works best for your tastes. Whether you’re a beginner or experienced baker, each loaf you bake teaches you something new about this wonderful, ancient craft. Happy baking!
FAQs
1. What is the biggest mistake you can make with your sourdough starter?
The biggest mistake is not feeding your starter regularly or keeping it in an environment that’s too cold. This can lead to weak fermentation and poor bread rise.
2. What is the secret ingredient in sourdough bread?
The secret ingredient is the wild yeast and bacteria in the sourdough starter. These naturally occurring microorganisms create unique flavors and textures.
3. What not to do when making sourdough bread?
Avoid over-proofing your dough, which can lead to a flat loaf. It’s also important not to rush the fermentation process.
4. How to get better at making sourdough bread?
Practice is key—experiment with different hydration levels, flour types, and fermentation times. Also, consistently monitor your starter and dough for signs of progress.